NAIL DRILL BITS FOR MANICURE AND PEDICURE

Professional nail sander Nail drill bits

This selection brings together KMIZ diamond and tungsten-carbide bits, along with mixed sets. Choose the material, shape, diameter, working-part length and abrasiveness according to the area, material being worked and desired result.

Diamond flame-shaped nail drill bit with orange and blue rings.

Distinguish diamond and carbide according to the material

Match the shape to the area and technical movement

Compare diameter and working-part length for each item

Read the band as the manufacturer’s abrasiveness marker

Check compatibility, rotation and recommended speed

Follow hygiene and maintenance procedures

73 products

How do you choose a professional nail drill bit?

Diamond or carbide: start with the material

A diamond bit has an abrasive surface. In this selection, it is used for precise manicure and pedicure work according to its shape and grit. A tungsten carbide bit has cutting teeth, mainly intended to reduce, shape or remove gel, acrygel and other artificial materials specified on its product page. A carbide removal bit should not be used directly on the natural nail plate unless designed for that purpose. Technique, pressure and speed matter with either material.

Which shape for which area?

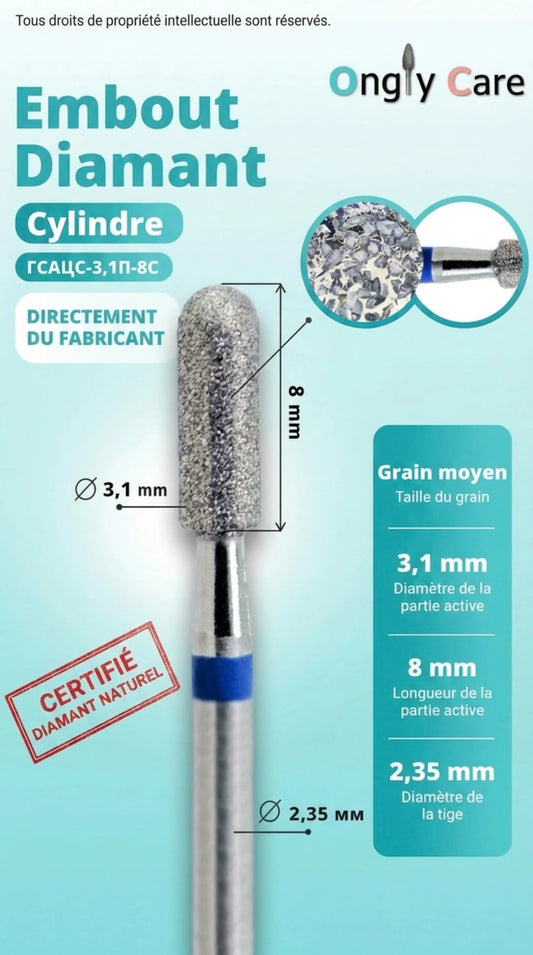
Flame and Tornado flame bits provide access to the sidewalls and cuticle area; ball bits allow localized finishing. Olive, tulip and barrel shapes offer different contact profiles. For removing and shaping an artificial enhancement, compare carbide cones, long cones and rounded barrel shapes, including their dimensions. The same shape comes in different diameters and active lengths, changing access, working surface and control.

Understand color rings and dimensions

KMIZ rings identify levels of abrasion or cutting for particular references. This selection includes yellow, red, blue, purple and green markings, sometimes combined; interpretation depends on the material and the manufacturer's designation. Color alone cannot compare a diamond flame with a carbide bit. Also read the shape, diameter, head length, teeth or grit, and stated use on each product page.

Build a practical selection

The collection includes individual bits and mixed diamond/carbide kits for several stages of a service. Build an assortment around actual tasks: targeted preparation, finishing, material reduction or removal, then choose dimensions and cutting level. Left-handed references are also available; check the intended direction of rotation. The diamond and carbide categories below help narrow the choice before comparing products.

Guide: selecting nail drill bits

1. Identify the stage and material

First identify the working area and material: natural nail, surrounding area or artificial coating. For precise preparation or finishing, consult diamond bits suited to that stage. For reducing or removing an artificial enhancement, consider carbide references. Each bit's product instructions take priority over a general rule.

2. Choose a diamond bit

Compare shape and abrasiveness rather than relying on color alone. A narrow flame, for example 1.8 × 8 mm or 2.3 × 10 mm, has a different contact surface from a ball, tulip or barrel. The diamond references on this page cover several areas and abrasion levels; choose according to your technique, control and the product instructions.

3. Choose a carbide bit

Carbide teeth cut away artificial material. A 5 or 6 mm rounded barrel and a narrow cone differ in working surface and access. Compare the tooth pattern, diameter and active length before choosing a bit for gel, acrygel or removal. A more aggressive cut is not automatically suitable for every area.

4. Compare shapes and dimensions

Flame and olive shapes offer targeted access; ball, tulip and barrel shapes change the contact surface; cone and rounded barrel shapes serve other movements on artificial material. Dimensions in millimeters describe the head, not a safety level. Check the available space and keep the bit moving in a controlled way without prolonged pressure in one spot.

5. Read grit and cutting indicators

Colors are indicators within the KMIZ range, but the same mark does not make different materials or shapes interchangeable. Among the listed references, yellow and red generally indicate finer levels than blue; purple and green appear on stronger cutting levels depending on the family. Combined rings require reading the specific product page. Never infer a bit's use from color alone.

6. Check rotation direction

Some references are intended for left-handed use, including carbide cone #117975 and several diamond Tornado flames. Check the direction specified on the product page and your device before use. Reversing the motor does not replace a bit designed for that direction when the manufacturer specifies a particular rotation.

7. Check compatibility and speed

Before fitting a bit, check the shank diameter, chuck and device manufacturer's instructions. Follow the speed range and rotation direction for the particular reference; do not use one setting for every bit. Apply measured pressure and stop if you notice heat, unusual vibration or discomfort.

8. Clean and replace

Remove debris after every service and follow the manufacturer's procedures for cleaning, disinfection, sterilization where applicable, and drying for the material and equipment. Inspect the teeth or abrasive surface regularly and replace worn or damaged bits. A kit helps organize your tools, but each piece still needs an individual check.

Frequently asked questions about nail drill bits

What is the difference between a diamond bit and a tungsten-carbide bit?

A diamond bit is generally selected for precise work around cuticles, lateral folds and the natural nail. A carbide bit is used in particular to shape or remove artificial materials. The exact application still depends on shape, abrasiveness and the directions on each product page.

How do you choose the shape of a nail drill bit?

Choose according to the area and movement: a flame or olive provides targeted access, a ball suits localized finishing, while a cone, barrel or paraboloid provides a different working surface. Also compare diameter and working-part length.

What do the colored bands on KMIZ bits mean?

The colored bands serve as markers for abrasiveness levels within the manufacturer’s range. Color alone does not define the application: also check material, shape, dimensions and the full product designation before choosing.

How do you check compatibility and care for a nail drill bit?

Check the shank diameter, permitted rotation direction and speed guidance for both your e-file and the bit. After use, remove residue and then follow the manufacturer’s recommended procedures for cleaning, disinfection, sterilization and drying.